1.5T HD 8Ch CTL Coil Setup for SNR Test
Prerequisites
1 Legacy Phantom Setup
Procedure
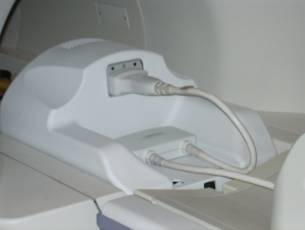
- Position the coil in the cradle, connect the cable as shown
in Figure 1 .
Figure 1. Connecting the Coil
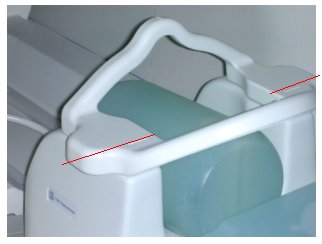
- Place a phantom between Posterior and Anterior parts of the
coil as shown in Figure 2.
Figure 2. Positioning Phantom

- Landmark on the coil crosshairs as shown in Figure 3.
Figure 3. Landmarking Coil
- Perform Multi-Coil Quality Assurance Tool.
2 Unified Phantom Setup
Procedure
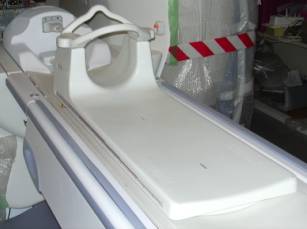
- Place the coil on the patient table and latch it to the table.
- Place the TL unified phantoms on the centre of the TL section
of the coil as shown inFigure 4.
Figure 4. Place the TL unified phantoms
- Align the phantoms to the centre in S/I and R/L directions as
shown in Figure 5 and Figure 6.
Figure 5. Align the phantoms (1)
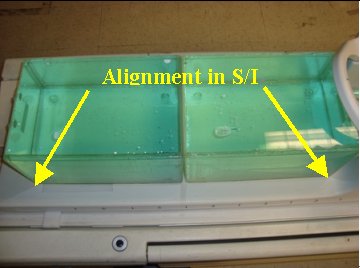
Figure 6. Align the phantoms (2)

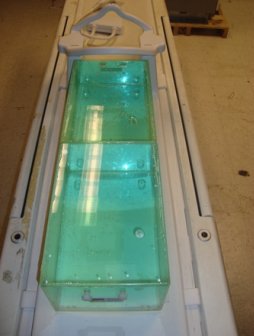
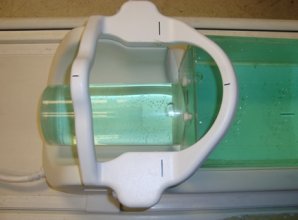
- Place the large cylindrical unified phantom on the CT section
and fix the C-Spine Bridge to the hooks provided as shown in Figure 7.
Figure 7. large cylindrical unified phantom
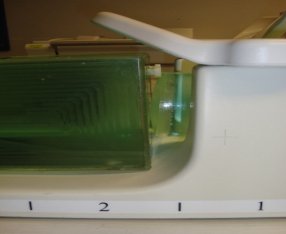
- Adjust the large cylindrical unified phantom such that it is
in complete contact with the TL unified phantom (Figure 8).
Figure 8. Adjust the large cylindrical unified phantom
- Adjust TL unified phantoms such that both the phantoms are in
complete contact with each other as shown in Figure 9.
Figure 9. Adjust TL unified phantoms

- Connect the coil to respective port of the system LPCA.
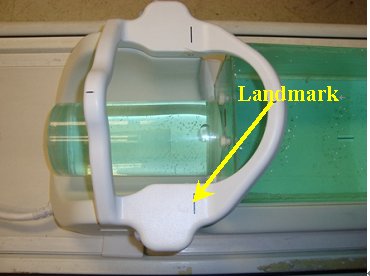
- Landmark the coil at the cross mark line on the C-Spine Bridge
(Figure 10) and advance to scan.
Figure 10. Landmark
- Perform Multi-Coil Quality Assurance Tool.
3 Finalization
Finalization
No finalization steps.