LCD Monitor Setting for NEC P242W Video Monitor
 |
|
1 LCD Monitor Input Priority Setting
-
See Figure 1 and Figure 2 for control locations and functions.
Figure 1. NEC P242W Video Monitor On View Controls
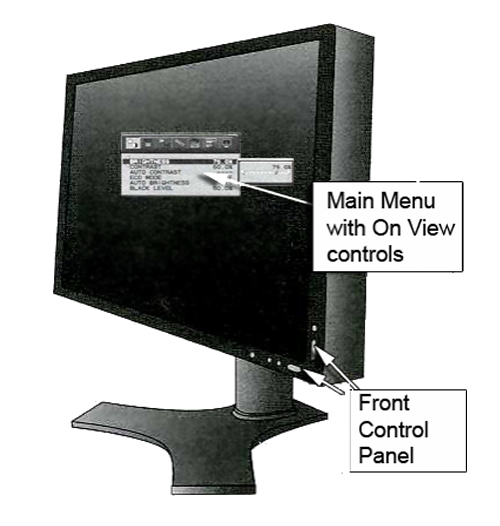
Figure 2. Control Panel
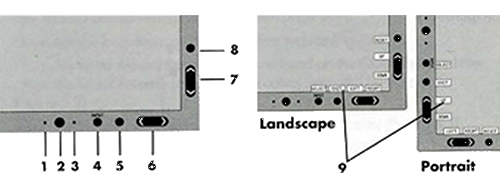
* The Left/Right and Up/Down buttons functionality is interchangeable depending on the orientation (landscape/portrait) of the OSD.
-
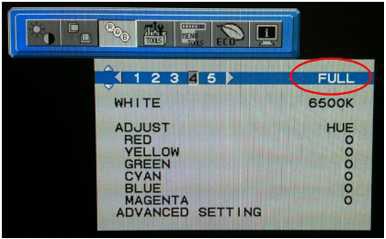
Set Picture Mode to FULL (4) using the following key entries:
-
Menu
-
Right arrow
-
Right arrow
-
Down arrow
-
Left/Right arrow to set to FULL (4)
Figure 3. Setting Picture Mode to FULL
-
-
Press MENU to exit.
-
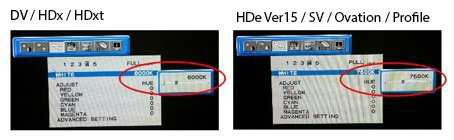
Set WHITE to the correct value for your system
Use the following key entries to access and change the value.
-
Menu
-
Right arrow
-
Down arrow
-
Left/Right arrow to set the value for your system
Figure 4. Setting WHITE to Correct Temperature
-
-
Press MENU to exit.
-
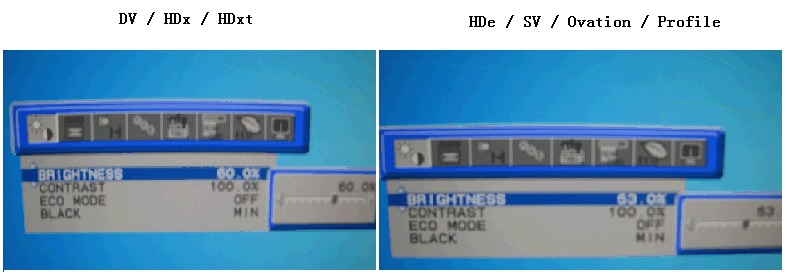
Set Brightness to the correct value for your system listed in the following table.
Use the following key entries to access and change the value.
-
Menu
-
Down arrow
-
Left/Right arrow to set the value for your system.
Figure 5. Set Brightness
-
-
Press MENU to exit.
2 Finalization
-
Perform a scan to ensure the system is working properly.
-
If the system has a camera and the customer wants to match the camera image to the new monitor image, the customer must notify the camera vendor that a new monitor type has been installed and camera adjustments are required.